There are 3 phases in the Salesforce integration configuration
- Initial setup and Salesforce platform configuration
- Establishing a connection with the Salesforce platform
- Configuring the donations for Salesforce
1. Initial setup and Salesforce platform configuration
OrgHQ administrators for organisations on the Pro plan on GiveNow can access the integrations page via the Integrations tab in the OrgHQ Details menu section.
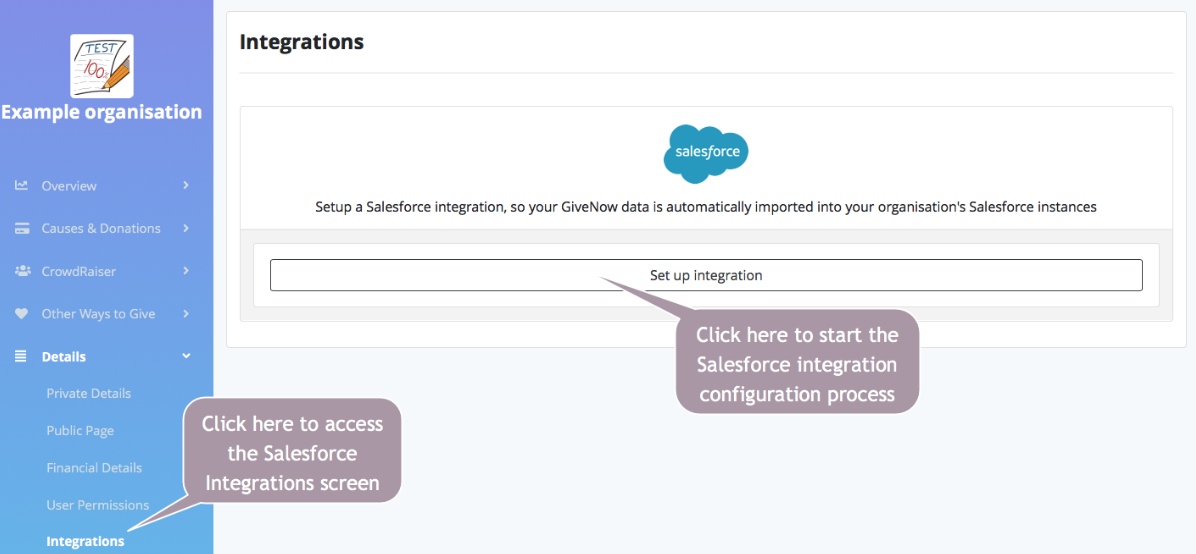
After clicking the ‘Set up integration’ button, the GiveNow platform will send an email with further instructions about configuring the Salesforce platform for communication with GiveNow. The Salesforce platform configuration for GiveNow is discussed in more details in the section Salesforce Platform configuration for GiveNow.
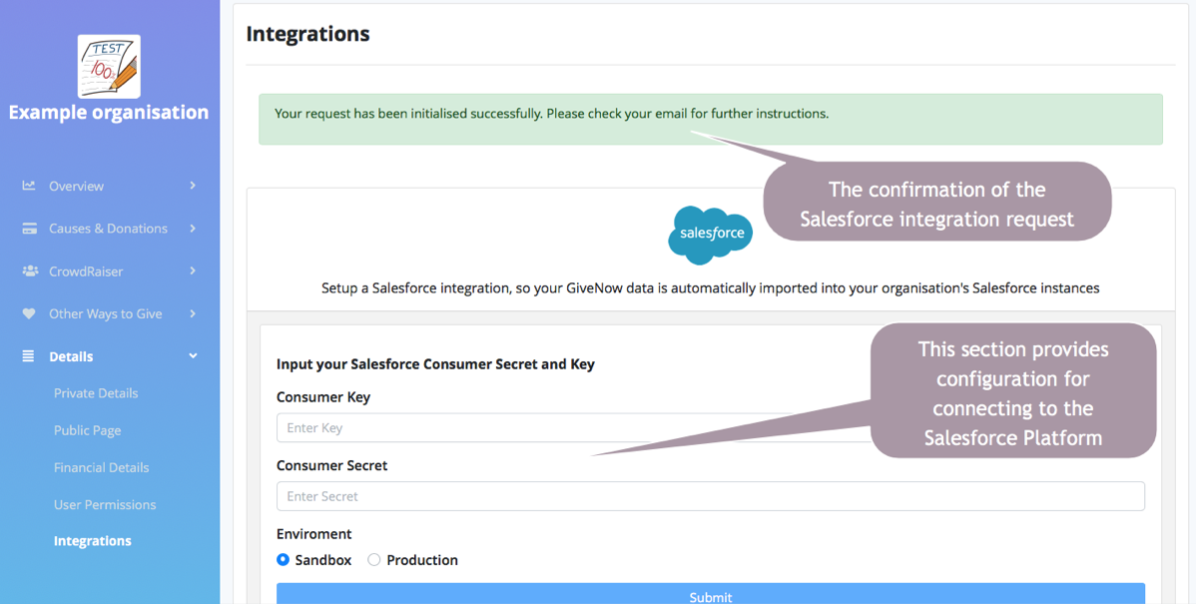
After the email is sent, the GiveNow platform provides the configuration screen for connecting to the Salesforce platform.
2. Establishing a connection with the Salesforce platform
For connecting to the Salesforce platform, you will need to provide the consumer key and consumer secret of the Salesforce connected application that was configured according to the email that was sent to the user (see above and Salesforce Platform configuration for GiveNow.)
The configuration provides you with a choice from two environments: Sandbox and Production. Note: It is advised that before applying the configuration to the production Salesforce environment, your first integrates with a sandbox environment in Salesforce. This gives you the opportunity to preview the donation data that is posted to the system and further tune the environment.
After you have submitted the consumer key, secret, and environment, the GiveNow platform tries to connect to the Salesforce platform.
Normally after the connected application is created in Salesforce, you will have to wait around 10 minutes while the new application is initialised.
If you see the screen below, we recommend going back to the previous page, waiting for 5 - 10 minutes and submitting the form again.

If the Salesforce connected application is ready to accept requests, Salesforce provides the standard Salesforce login screen.
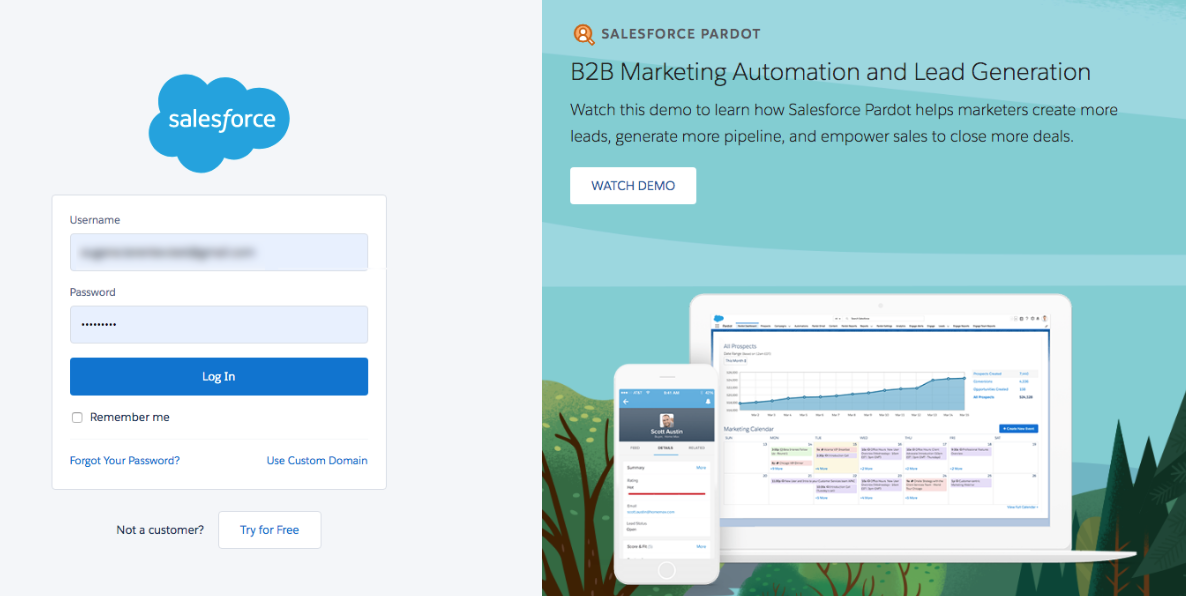
Once logged in, Salesforce verifies your user credentials and asks to confirm access rights.
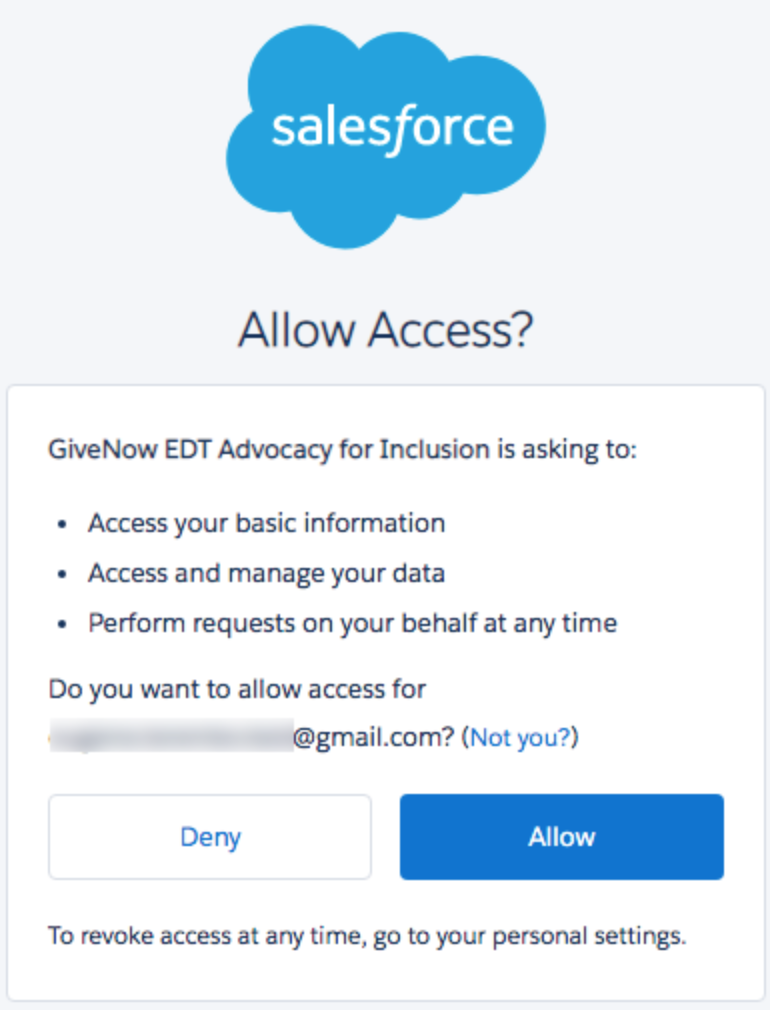
After allowing the access permissions, GiveNow provides the configuration page to configure the process of sending donations to Salesforce.
3. Configuring the donations for Salesforce
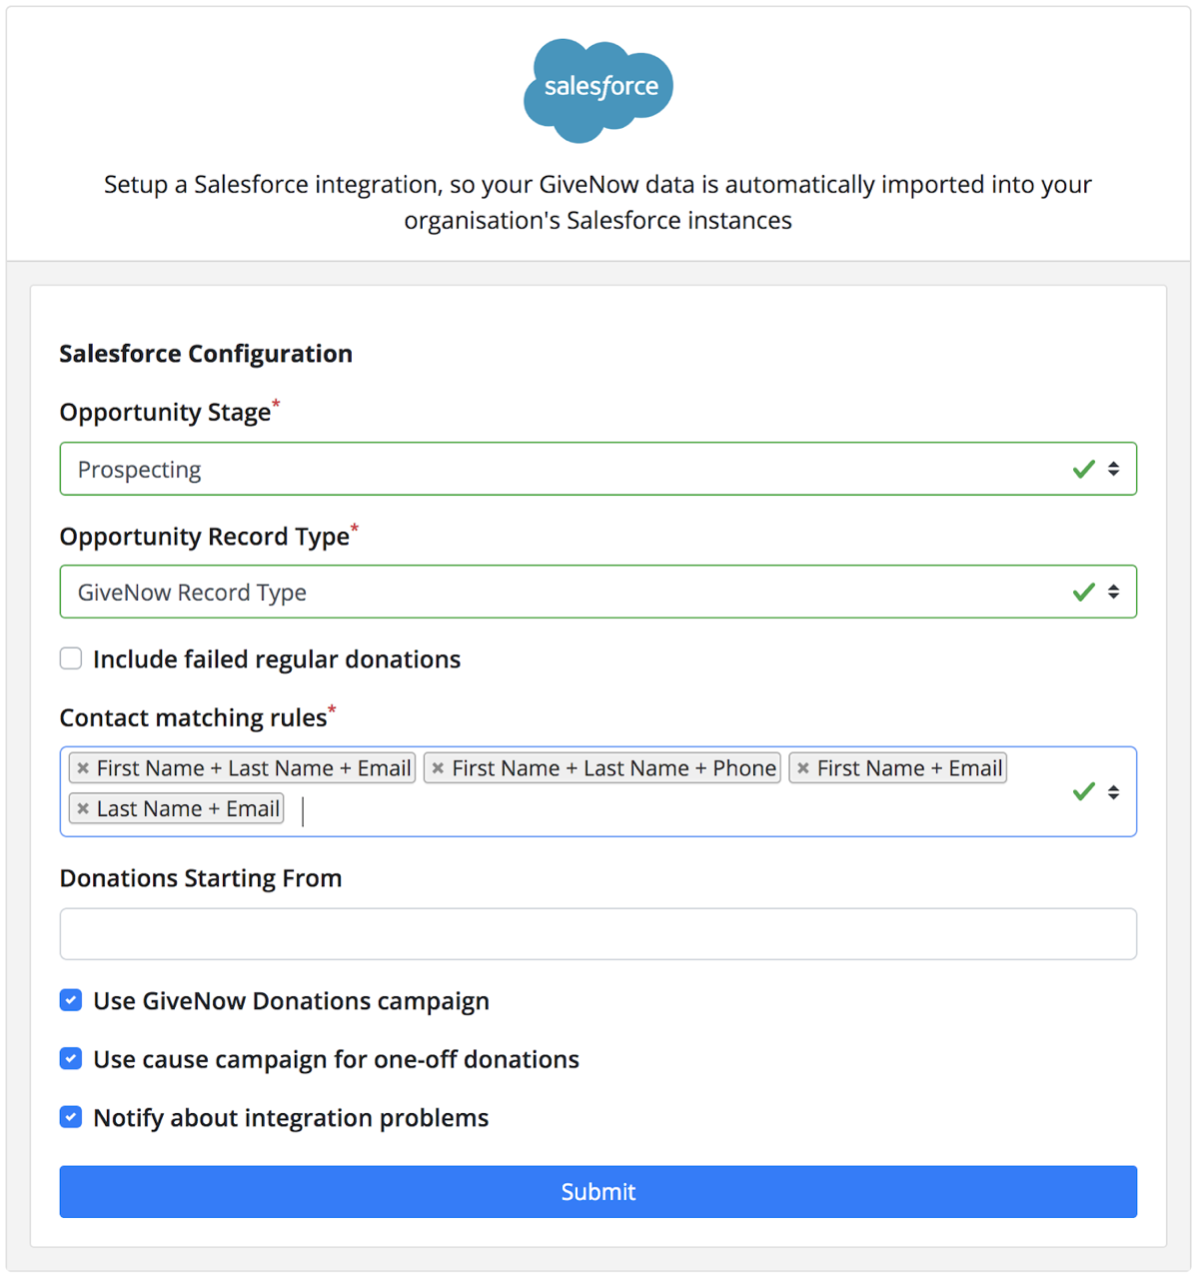
In the last step of the Salesforce integration configuration, you can configure the following settings:
Opportunity Stage - the stage from the list of opportunity stages available on your Salesforce platform. The selected stage will be assigned to all opportunities that GiveNow creates on the Salesforce platform.
Opportunity Record Type - the record type from the list of opportunity record types available on your Salesforce platform. The selected record type will be assigned to all opportunities that GiveNow creates on the Salesforce platform.
Include failed regular donations - if this option is selected, then GiveNow sends regular donations that are declined by the financial institution to your Salesforce account.
Opportunity Stage for Failed Donations - the record type from the list of opportunity record types on your Salesforce platform. This field is visible when Include failed regular donations is selected. The selected record type will be assigned to all opportunities that GiveNow creates on the Salesforce platform for failed regular donations.
Contact matching rules - the rule that is used to lookup donor in the Salesforce platform. The supported matching rules at the moment of writing this document are:
- First Name + Last Name + Phone
- First Name + Last Name + Email
- First Name + Email
- Last Name + Email
Multiple matching rules can be selected. The order in which the rules are used is as in the list above.
Donations Starting From - the date when a donation is created. If you define this date, then GiveNow sends only the donations that are created from that date.
Use GiveNow Donations Campaign - if selected, GiveNow creates the campaign “GiveNow Donations” in your Salesforce account. All GiveNow donations and corresponding campaigns are posted under the campaign “GiveNow Donations”.
Use Cause Campaign for One-off Donations - if selected, GiveNow will create campaigns for the causes that are set up in your organisation. The campaign name will be the same as the name of the cause the campaign is created for.
Notify about integration problems - if selected, GiveNow will send a notification email to the user who initiated the Salesforce integration if it encounters problems with integration. For example, the contact that was connected to the GiveNow user is removed from Salesforce.
After submitting the configuration, the platform displays the Salesforce configuration details page.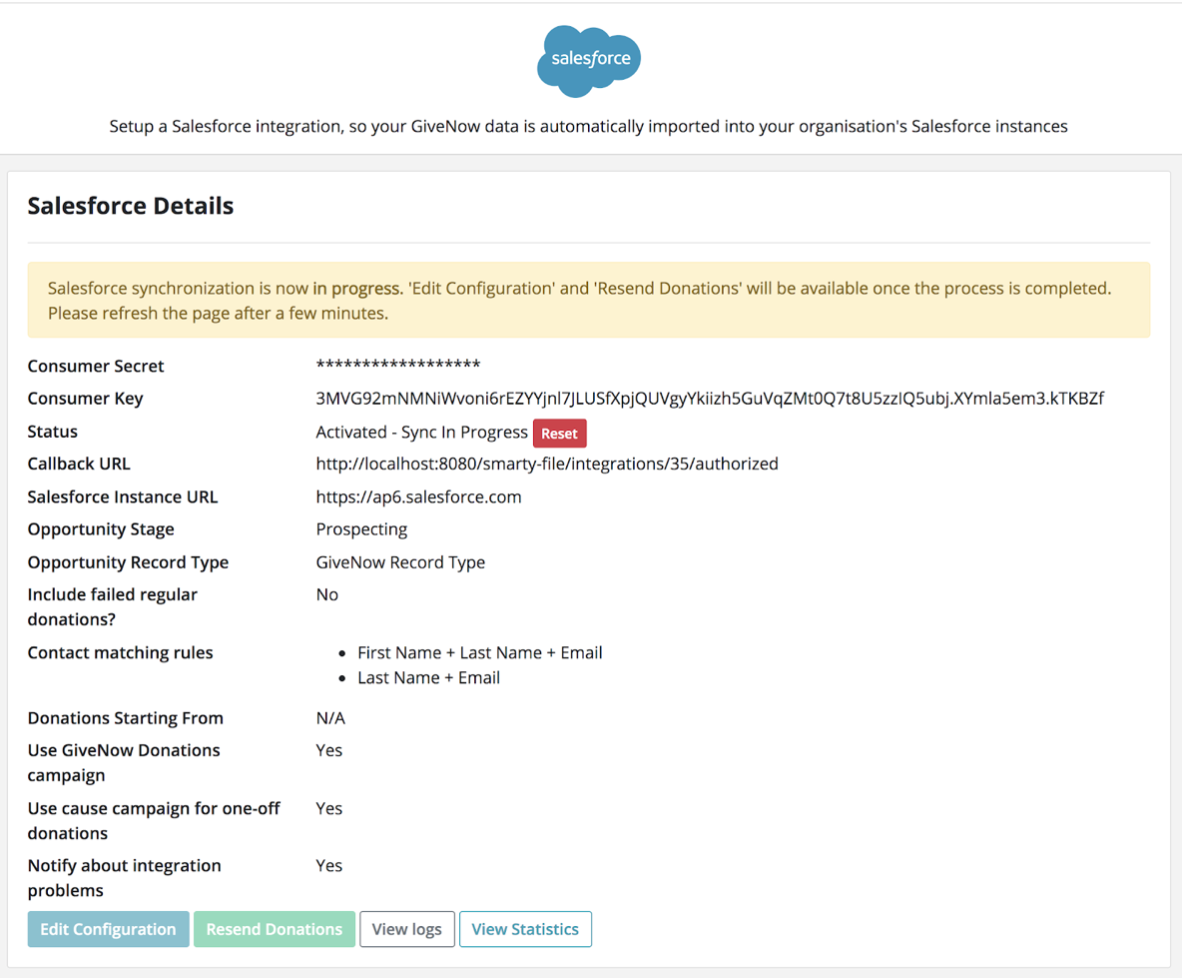
At the same time, the GiveNow platform starts the process of sending retrospective donations to the Salesforce platform. The process of sending the donations is described in the section Sending Donations to Salesforce.
